


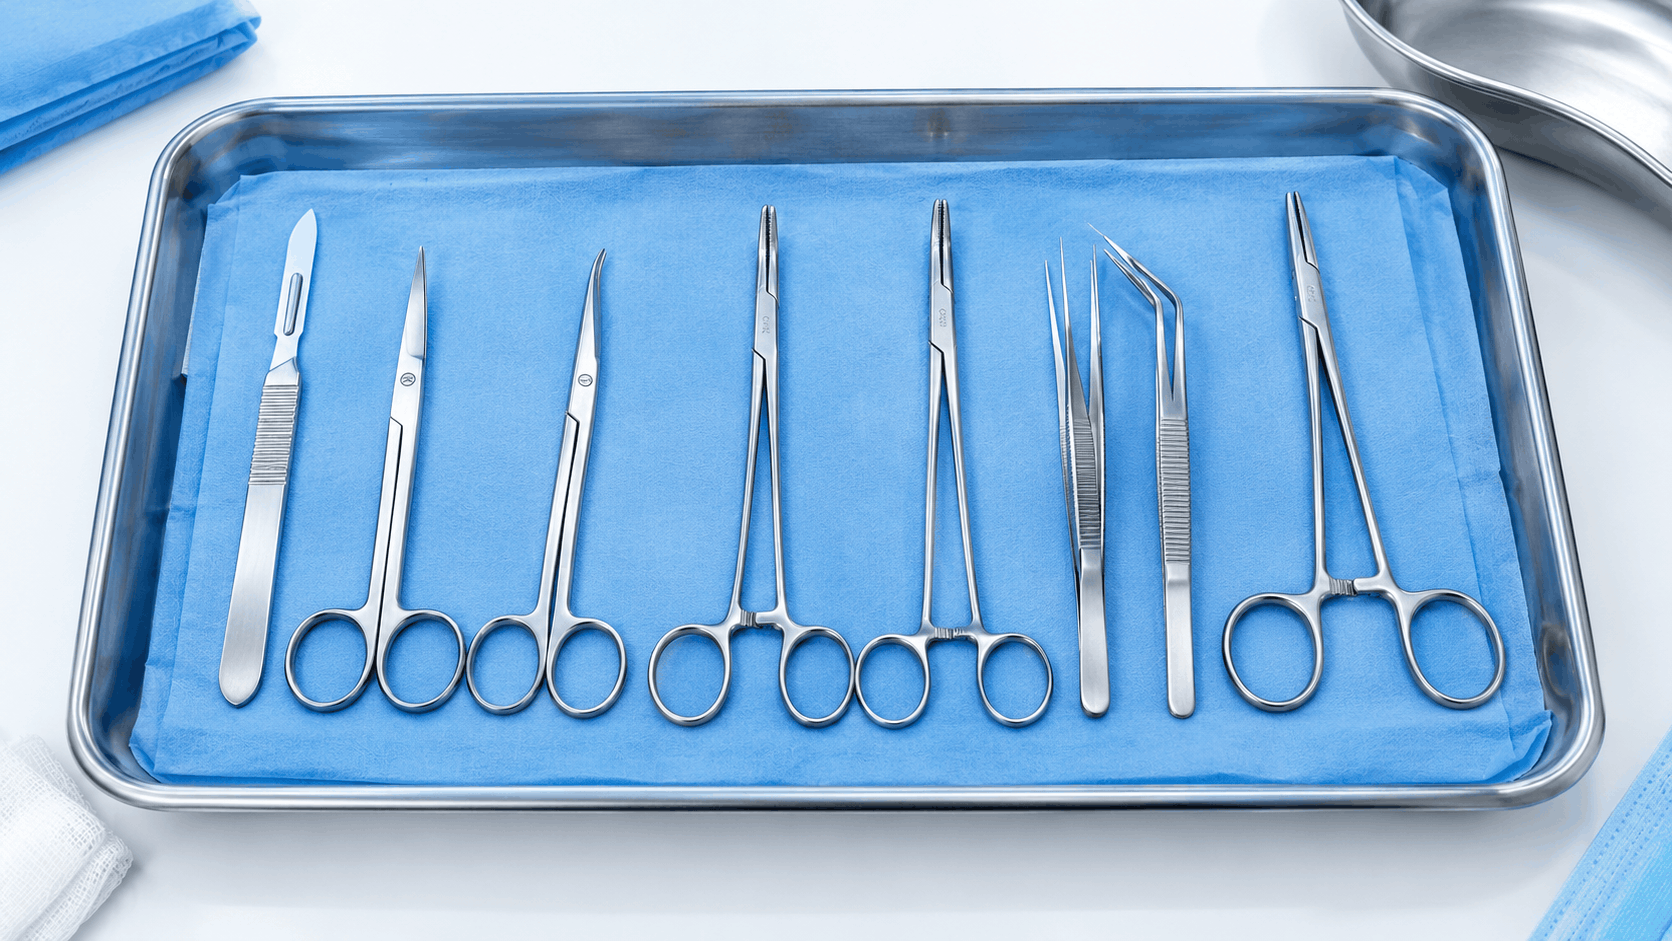
Stainless steel surgical instruments are the cornerstone of safe, efficient surgery. From a simple scalpel handle to a complex orthopedic retractor, almost every reusable instrument in a modern operating room is made from medical-grade stainless steel. Hospitals, day-care clinics, dental practices, veterinary centers and field medical groups all rely on these instruments because of their strength, hygienic properties and ability to withstand thousands of sterilization cycles.
If you are a surgeon, a nurse, a sterile processing technician, a hospital procurement officer, or a business owner who wants to buy or sell surgical tools, you need to understand how stainless steel surgical instruments work. The material grade, manufacturing method, surface finish and proper cleaning all affect patient safety and long-term cost.
In this complete guide, you will learn what stainless steel surgical instruments are, how they developed, which grades are used, how they are manufactured, the 6 main types, how they are used across medical specialties, how to choose high-quality products and how to clean, sterilize and maintain them for years of reliable service.
This guide is written by the team at OrthoGear Surgical, a surgical instruments manufacturer and exporter based in Sialkot, Pakistan. If you want to see the products discussed below, you can browse our surgical instruments shop at any time.
What Are Stainless Steel Surgical Instruments?
Stainless steel surgical instruments are specialized hand-held tools made from corrosion-resistant steel alloys. They are used to cut, grasp, clamp, retract, dilate, probe, suture and examine tissue during medical, dental and veterinary procedures. They are handled by trained professionals in sterile environments, and they must meet strict standards for material quality, dimensional accuracy and cleanliness.
The word “stainless” comes from the chromium content of the alloy. Stainless steel must contain at least 10.5% chromium. When chromium comes into contact with oxygen, it forms a very thin, invisible layer of chromium oxide on the surface, known as the passive layer, which protects the steel underneath from rust and staining. If the surface is scratched or damaged, the layer can renew itself in the presence of oxygen. This is why stainless steel surgical instruments can last for years when they are properly handled and cared for.
Surgical instruments are manufactured with a high level of precision. A misaligned jaw tip, box lock or ratchet can change how an instrument performs in the surgeon’s hand. That is why the quality of the steel and the skill of the manufacturer matter as much as the design of the instrument itself.
A Short History of Surgical Instruments
Surgical tools have existed for thousands of years. Early surgeons used instruments made from stone, bone, bronze and iron. Ancient Egyptian, Greek, Roman and Indian physicians left detailed descriptions, and even preserved scalpels, forceps, probes and retractors from their time. Although impressive for their era, these tools corroded easily and caused infection when they were reused.
The real turning point came in the nineteenth century. As the understanding of germs and infection spread, sterilization became a must, and tools made from wood, ivory or untreated iron were no longer safe. The invention and commercial development of stainless steel in the early twentieth century finally made it possible to produce instruments that could be sterilized, polished and reused again and again.
Manufacturers have since perfected the alloys and heat-treatment methods we know today, and stainless steel surgical instruments are now used around the world. The global surgical instruments industry continues to grow as demand for surgery and access to healthcare increase.
Why Stainless Steel Is the Preferred Material for Surgical Instruments
There are several reasons why stainless steel surgical instruments remain the preferred choice over plastic, aluminum, titanium and other metals for most reusable tools.
- Corrosion resistance: Withstands blood, saline, body fluids, disinfectants and cleaning chemicals.
- Strength and durability: Maintains shape, edge and grip under heavy use and handling.
- Sterilization compatibility: Tolerates steam autoclaving, dry heat, ethylene oxide and chemical disinfection without degradation.
- Hygiene: The non-porous surface is easy to clean and resists contaminants and bacteria when properly processed.
- Machinability: Can be forged, machined, ground, polished and finished to tight tolerances.
- Cost-effectiveness: Long-lasting, high-grade stainless steel surgical instruments reduce the cost per use compared with disposable alternatives.
- Availability: Medical-grade stainless steel is widely produced, so supply is stable and prices are reasonable.
For these reasons, stainless steel surgical instruments remain in use in countries with advanced healthcare systems and in developing regions alike.
Grades of Stainless Steel Used in Surgical Instruments
Not all stainless steel is the same. The grade determines the alloy’s hardness, flexibility, toughness and corrosion resistance. There are several stainless steel families, but two matter most for surgical use: martensitic and austenitic.
| Grade | Steel Type | Typical Use |
|---|---|---|
| 304 | Austenitic | Trays, basins, retractors, non-cutting tools |
| 316 / 316L | Austenitic | Instruments and implants needing extra corrosion resistance |
| 410 | Martensitic | Forceps, hemostats, general instruments |
| 420 | Martensitic | Scissors, needle holders, scalpel handles |
| 440 | Martensitic | Cutting edges that need very high hardness |
Martensitic Stainless Steel (400 Series)
Martensitic steel contains chromium and a controlled amount of carbon, and it can be hardened by heat treatment. This makes it the best choice for instruments that must hold a sharp edge or a firm grip. Scissors, forceps, hemostats, bone cutters and needle holders are commonly made from grades 410, 420 and 440. Martensitic steels have slightly lower corrosion resistance than austenitic steels, so proper cleaning and drying are important.
Austenitic Stainless Steel (300 Series)
Austenitic steel contains chromium and nickel. It has excellent corrosion resistance and toughness, but it cannot be hardened by heat treatment. It is used for non-cutting stainless steel surgical instruments such as retractors, basins, trays and sterilization containers. Grade 316L, which has low carbon content and added molybdenum, is also used for implants because of its exceptional resistance to body fluids.
Why the Grade Matters
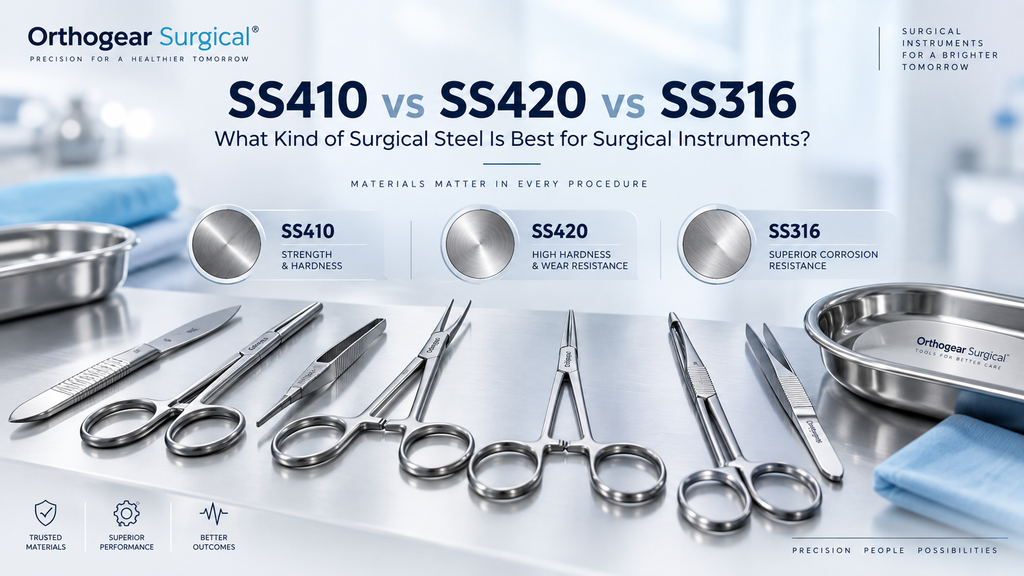
Using the wrong grade can lead to instrument failure. A scissor made of soft steel will dull quickly, a hemostat made of poor steel can corrode or fail to lock, and a retractor made of the wrong alloy can bend under load. When buying stainless steel surgical instruments, always ask the supplier which grade is used for each product, and do not accept vague answers like “high quality steel” without specifications. At OrthoGear Surgical, we publish our materials and stainless steel details openly, and our instruments are made from SS 410, SS 420 and SS 316.
Relevant International Standards
Trusted manufacturers follow international standards. ISO 7153-1 specifies the metallic materials used for surgical instruments, and ASTM F899 covers wrought stainless steels for surgical instruments. Quality management for medical device manufacturers is governed by ISO 13485. Instruments sold in Europe typically carry CE marking under the Medical Device Regulation, while instruments sold in the United States must comply with FDA medical device requirements. Checking these standards helps you separate professional manufacturers from low-quality suppliers. You can read how we apply them in our quality control and inspection process.
How Stainless Steel Surgical Instruments Are Manufactured
The quality of stainless steel surgical instruments depends heavily on the manufacturing process. A good product goes through multiple steps, each of which requires skill and quality control. You can see our full workflow on the surgical instrument manufacturing process page.
1. Material Selection and Cutting
The process starts with selecting the right grade of stainless steel in the form of bars, sheets or blanks. The material is then cut to size, and the supplier’s material certificate should be checked to confirm the grade.
2. Forging
Most high-quality instruments are drop forged. The steel is heated until it softens, then pressed into a die to shape the instrument and align the grain structure of the metal. Forged instruments are typically stronger and more durable than instruments cut from flat sheet metal.
3. Trimming and Milling
The flash (the extra metal left over from forging) is trimmed away. Milling machines then cut the box lock, ratchet, serrations and joints to the specified dimensions. The two halves of a clamp or forceps must fit together to a tight tolerance.
4. Heat Treatment
Martensitic instruments are heated and cooled under controlled conditions until they reach the desired hardness, usually measured on the Rockwell scale. Under-treatment or over-treatment must be avoided, because incorrectly treated steel produces an instrument that is either too soft or too brittle.
5. Assembly and Grinding
The parts are assembled, and the jaws, tips and cutting edges are ground and aligned. For scissors, the blades must meet along their full length under the right tension. For needle holders, the jaws must close to a tight tolerance so the needle is held securely.
6. Polishing and Finishing
The instrument is ground and polished to a smooth surface. A smooth surface is easier to clean and less likely to trap debris.
7. Passivation
Passivation is a chemical treatment, typically with nitric or citric acid, that removes free iron from the instrument’s surface and promotes the formation of a strong chromium oxide layer. A passivated instrument has greater resistance to rust and staining.
8. Inspection and Packaging
Each instrument is inspected for alignment, finish, sharpness, locking action and dimensional accuracy. Good manufacturers keep batch records so that every instrument can be traced back. The instruments are then cleaned, marked and packed for shipping.
Surface Finishes of Stainless Steel Surgical Instruments
The finish of an instrument is more than just appearance. It affects light reflection, cleanliness and corrosion resistance.
- Mirror (bright) finish: Shiny and easy to clean, but it can reflect the operating lamp and cause glare.
- Satin or matte finish: Preferred by many surgeons because of reduced glare, and easy to clean when the surface is smooth and even.
- Black or ebonized finish: Used on specific instruments to reduce reflection. The coating must be durable and approved for repeated sterilization.
- Color-coded rings or handles: Some stainless steel surgical instruments use gold handles to mark tungsten carbide inserts, or colored rings to show the instrument type or size quickly.
Make sure the finish is even and free of pits and burrs, and that there is no sharp edge where a sharp edge should not be. Buyers who need a specific finish can request it through our custom surgical instruments service.
6 Must-Know Types of Stainless Steel Surgical Instruments
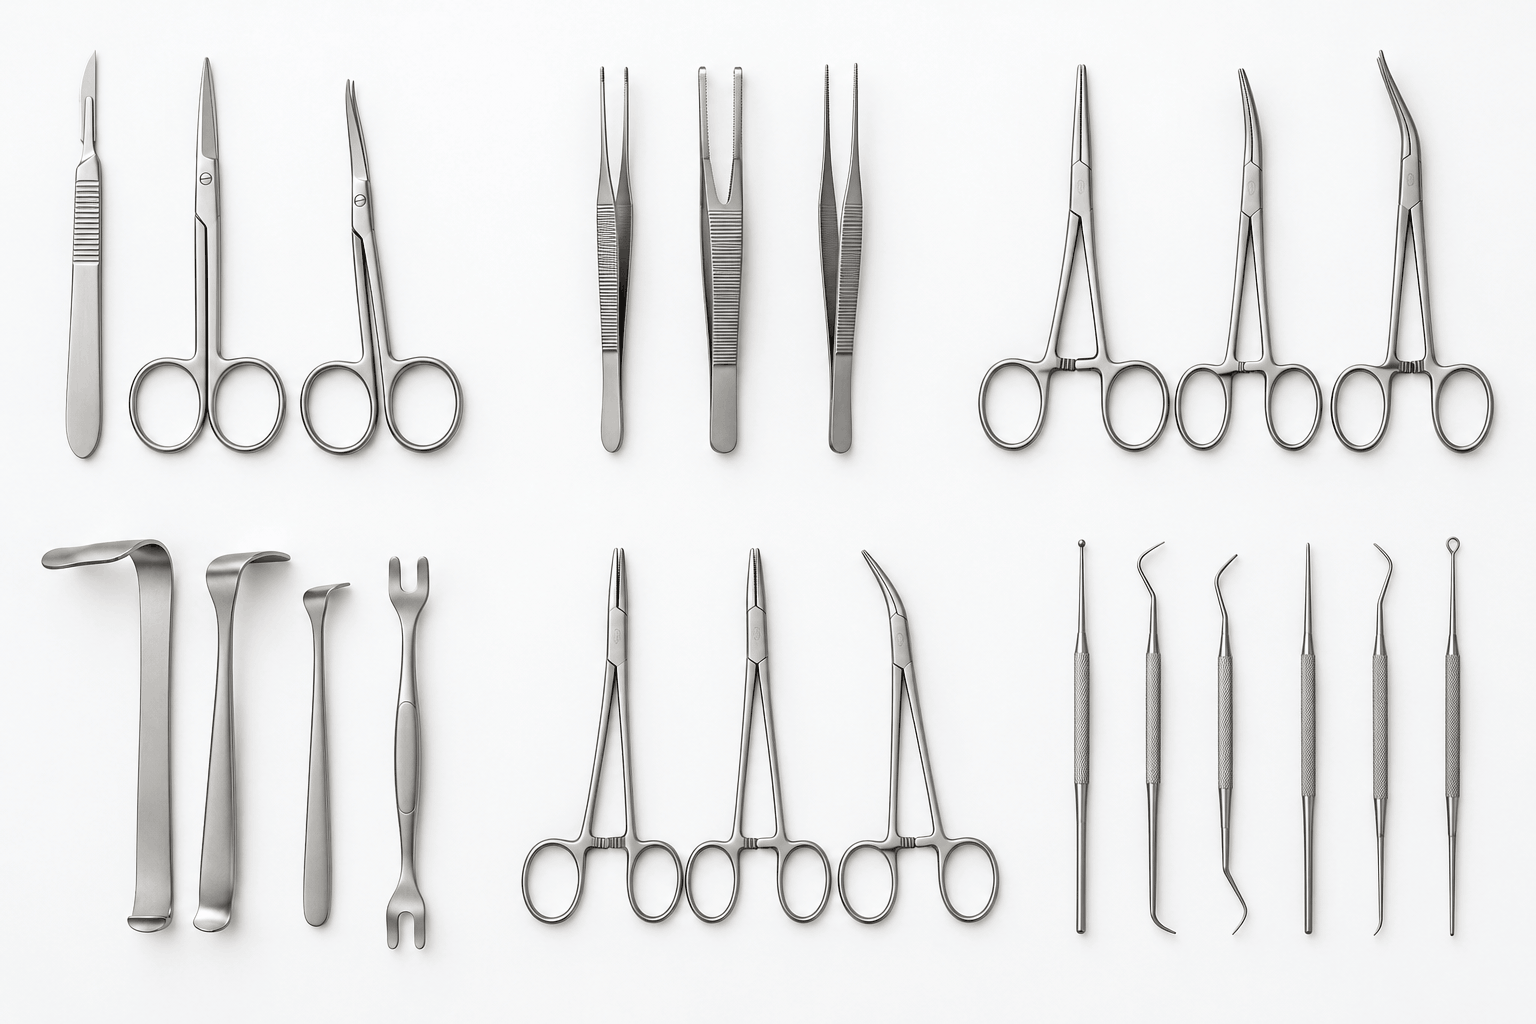
There are thousands of different instruments, but most stainless steel surgical instruments can be divided into six categories based on their function.
1. Cutting and Dissecting Instruments
These are used mainly for incising, separating, trimming and removing tissue. Common examples include:
- Scalpel handles: Hold replaceable blades. Common handle sizes include No. 3, No. 4 and No. 7.
- Surgical scissors: Mayo scissors for heavy tissue and sutures, Metzenbaum scissors for delicate dissection, and iris scissors for fine work.
- Bone cutters and rongeurs: Used to cut or nibble away bone in orthopedic and neurosurgical procedures.
- Osteotomes and chisels: Used to cut or shape bone.
Sharpness and edge retention are of utmost importance here, so high-hardness martensitic steel is typically used. Blades should meet smoothly without gaps, and the pivot screw should hold the proper tension.
2. Grasping and Holding Instruments
These stainless steel surgical instruments hold tissue, organs, dressings or other objects during surgery.
- Tissue forceps: Available with teeth (such as Adson forceps with teeth) or without (smooth or serrated) to grip tissue of varying toughness.
- Dressing forceps: Used to handle dressings and non-delicate tissue.
- Allis tissue forceps: Have small teeth to grip tough tissue like fascia.
- Babcock forceps: Have atraumatic, rounded tips to hold delicate structures such as bowel.
- Sponge-holding forceps: Hold gauze or sponges for cleaning or packing.
The tips should align to a tight tolerance. Teeth must interlock without gaps, and serrations should grip firmly without damaging tissue.
3. Hemostatic Instruments
Also known as artery forceps, hemostats clamp blood vessels to stop bleeding. They have long jaws and a ratchet lock that keeps the clamp closed without the surgeon applying constant pressure.
- Kelly forceps: Medium to large clamps for larger vessels and tissue.
- Mosquito forceps: Small clamps for small vessels.
- Crile forceps: Short clamps with fully serrated jaws.
- Rochester-Pean and Rochester-Ochsner forceps: Heavier clamps for thicker tissue.
The ratchet must lock firmly and release smoothly. A hemostat that opens by itself during a procedure is a serious safety hazard, so this must be tested carefully.
4. Retractors
Retractors hold tissue, skin, muscle or organs out of the way so the surgeon can see and reach the surgical site. There are two main categories:
- Hand-held retractors: Such as Senn, Army-Navy, Richardson and Deaver, held by an assistant.
- Self-retaining retractors: Such as Weitlaner, Gelpi, Balfour and Finochietto, which hold the incision open on their own and free the assistant’s hands.
Because retractors can hold heavy tissue, they must be strong and well finished. Edges should be smooth to avoid damaging tissue, and ratchets or locking screws must stay in place under pressure. Spine surgeons use many specialized retractors, which we cover in our guide to spinal surgery instruments.
5. Needle Holders and Suturing Instruments
Needle holders grip curved or straight needles so the surgeon can pass them through tissue and close wounds.
- Mayo-Hegar needle holders: The most common type, used in general surgery.
- Olsen-Hegar needle holders: Combine a needle holder with built-in scissors for cutting suture.
- Castroviejo needle holders: Fine instruments for ophthalmic and microsurgery.
Many needle holders have tungsten carbide inserts in the jaws. These inserts add to the cost of the instrument, but they improve grip and extend the instrument’s life. Suture scissors, wire cutters and stitch-removal tools also fall into this category.
6. Probes, Dilators and Specialty Instruments
This category is very broad and covers stainless steel surgical instruments used to explore, measure, widen, scrape or examine.
- Probes and directors: Used to explore wounds, cavities and tracts.
- Dilators: Used to widen openings such as the cervix or urethra.
- Curettes: Used to scrape tissue or debris.
- Speculums: Used to open and view body cavities, such as vaginal, nasal and ear speculums.
- Specialty tools: Dental elevators, orthopedic bone levers, ENT instruments and microsurgical tools.
These instruments often have very specific shapes and tip designs, so precision manufacturing and correct sizing are essential.
Applications of Stainless Steel Surgical Instruments Across Specialties
Stainless steel surgical instruments are used in nearly every branch of healthcare. Each specialty has its own set of tools and instrument trays.
- General surgery: Scalpels, scissors, forceps, hemostats, retractors and needle holders for procedures such as appendectomy, hernia repair and abdominal surgery.
- Orthopedic surgery: Bone cutters, rongeurs, osteotomes, bone holding clamps, periosteal elevators and retractors for fracture repair, joint surgery and spinal procedures. Fixation implants are listed in our plates and screws category.
- Dental surgery: Extraction forceps, elevators, scalers, curettes, mouth mirrors and probes for extractions, periodontal care and oral surgery. See our dental instruments manufacturing page for details.
- ENT surgery: Nasal speculums, ear forceps, tonsil instruments and fine scissors for ear, nose and throat procedures.
- Ophthalmic surgery: Micro-scissors, fine forceps and needle holders used in delicate eye procedures.
- Gynecology and obstetrics: Vaginal speculums, tenaculums, dilators, uterine curettes and cesarean section sets.
- Cardiovascular and thoracic surgery: Specialized clamps, retractors and vessel instruments.
- Neurosurgery: Fine forceps, retractors and micro-instruments for brain and spine surgery.
- Plastic and cosmetic surgery: Delicate scissors, skin hooks and fine forceps.
- Veterinary medicine: Surgical kits adapted for small and large animals.
Since requirements vary, it is best to choose instruments made for a specific specialty rather than a generic solution. Hospitals and clinics that need ready-to-use trays can look at our surgical instrument sets, which can be built around a specific procedure.
How to Choose High-Quality Stainless Steel Surgical Instruments
The right stainless steel surgical instruments protect patients, surgeons and your budget. Inferior instruments can fail during a procedure, corrode quickly and carry infection risk. When you shop, check the following points.
1. Confirm the Material Grade
Ask for detailed specifications such as 410, 420, 440 or 316L medical-grade stainless steel. A reliable supplier will provide a material certificate and will openly explain which grade is used for each instrument.
2. Inspect the Finish
A smooth mirror or satin finish with no scratches, burrs, pits or rough edges indicates good polishing and passivation. Run your fingers gently over the surface and edges. Rough areas can hold debris and damage tissue.
3. Test the Mechanics
Open and close each instrument several times. Box locks should move smoothly without grinding or looseness. Ratchets must engage firmly and release easily. Jaws and tips must meet to a tight tolerance. For scissors, the blades must cut cleanly along their entire length.
4. Check Certifications
Look for CE marking, ISO 13485 certification and FDA compliance where relevant. These indicate that the manufacturer has a recognized quality management system. Ask to see the certificates, and verify them if possible.
5. Choose a Reliable Manufacturer
Prefer manufacturers with strong quality control, product traceability, a clear warranty and a good reputation. Customer reviews, years of experience and willingness to provide samples are all useful indicators. Our sample policy explains how buyers can evaluate our instruments before placing a large order, and you can learn more about our team on the About OrthoGear Surgical page.
6. Compare Price with Quality
Very cheap stainless steel surgical instruments are typically made from low-grade steel with poor finishing. They may look fine at first, but they corrode or wear out quickly. Always compare the total cost of ownership, not just the initial price.
7. Consider Repair and Service Support
Good manufacturers and suppliers offer sharpening, repair and replacement services. Instruments that can be repaired often last much longer than those that must be discarded when they fail.
8. Check Packaging and Labeling
Instruments should arrive clean, protected, and labeled with product codes and, where required, lot numbers. Good packaging protects the instruments from damage during shipping. Our shipping policy describes how orders are packed and delivered worldwide.
Buying in Bulk: Wholesale, OEM and Private Label
Distributors, hospitals and brands often buy stainless steel surgical instruments in large quantities. In this case, the manufacturer’s production capacity, consistency between batches and flexibility matter as much as price.
- Wholesale and bulk orders: Direct factory pricing lowers the cost per piece. See our wholesale surgical instruments and bulk surgical instruments supplier pages.
- Distributors and importers: A stable supply chain and clear documentation help distributors serve their own customers. Read more on our surgical instruments distributors page, or learn how to start a surgical instruments distribution business.
- OEM and private label: Brands can sell instruments under their own name through OEM surgical instruments manufacturing or private label surgical instruments programs.
Cleaning, Sterilization and Maintenance Guide

Even the best stainless steel surgical instruments need regular cleaning, sterilization and maintenance to function properly and last for years. Poor cleaning is one of the main reasons instruments corrode, stain or fail early. Follow these steps to get the maximum value out of your instruments.
Step 1: Point-of-Use Cleaning
Rinse or wipe instruments right after use so that blood, tissue and body fluids do not dry on the surface. Dried debris is much harder to remove and can cause staining and corrosion. If there will be a delay before processing, keep the instruments moist with water or an approved pre-cleaning spray.
Step 2: Manual or Automated Cleaning
Clean the instruments with an enzymatic detergent and soft brushes, paying special attention to box locks, serrations, hinges and lumens. Ultrasonic cleaners are very effective at removing debris from tight areas, and washer-disinfectors give consistent, validated cleaning for larger volumes.
Step 3: Rinse with Distilled Water
Rinse thoroughly, preferably with distilled or deionized water for the final rinse. Tap water may contain minerals and chlorides that leave spots or cause pitting.
Step 4: Dry Completely
Dry the instruments immediately with a clean, lint-free cloth or in a drying cabinet. Moisture left on the surface or in the joints is a major cause of rust and water spots. Avoid abrasive materials that can scratch the surface.
Step 5: Lubricate
Apply a water-soluble instrument lubricant, often called instrument milk, to hinges, box locks and ratchets. This keeps moving parts smooth and reduces wear. Do not use oil-based or silicone lubricants, because they can prevent steam from reaching the surface during sterilization.
Step 6: Inspect
Check each instrument for cleanliness, damage, dull edges, bent tips, cracks, loose joints and signs of corrosion. Remove damaged items from circulation for repair or replacement, and contact the manufacturer if you find any issues.
Step 7: Package and Sterilize
Wrap the instruments or place them in sterilization pouches or containers. Sterilize using steam autoclaving, dry heat, ethylene oxide or chemical disinfection according to the manufacturer’s instructions. Follow the recommended temperature, pressure and time guidelines to avoid damaging the instruments. Open ratcheted instruments before sterilization so steam can reach all surfaces. For evidence-based recommendations, see the CDC’s Guideline for Disinfection and Sterilization in Healthcare Facilities and its page on steam sterilization.
Step 8: Store Properly
Store sterile instruments in a clean, dry place away from sunlight and moisture. Avoid stacking heavy instruments on delicate ones to prevent damage.
What to Avoid
- Prolonged soaking in saline, which can cause pitting
- Harsh chemicals such as bleach and strong chlorine-based cleaners
- Abrasive pads and steel wool that scratch the surface
- Washing stainless steel surgical instruments together with other metals
- Dropping instruments or throwing them into trays
- Using instruments for purposes they were not designed for, such as prying or cutting wire
Common Problems: Rust, Staining and Pitting
Although stainless steel resists corrosion, it is not completely immune. Most problems can be prevented.
- Rust spots: Appear when the passive layer is damaged or when contaminated water, residue or contact with rusting items attacks the surface. Clean, inspect and, if necessary, repassivate or replace affected instruments.
- Staining and discoloration: Brown, blue or rainbow stains can come from hard water minerals, detergent residue, overheating or chemicals. Distilled water, correct detergent dilution and thorough drying prevent most of them.
- Pitting: Tiny holes caused by chlorides in saline, bleach or poor water quality. Pits trap debris and bacteria, so pitted instruments should be removed from use.
- Cracks and fatigue: Repeated bending, overtightening or heavy impact can cause cracks near hinges and joints. Regular inspection catches problems before an instrument fails during surgery.
To protect your stainless steel surgical instruments, use distilled water for the final rinse, keep different metals separate during processing, never leave instruments soaking for long periods, and schedule periodic passivation and professional sharpening.
Frequently Asked Questions
Which stainless steel is best for surgical instruments?
It depends on the instrument. Martensitic grades such as 410, 420 and 440 are best for cutting and gripping tools because they can be hardened. Austenitic grades such as 304 and 316 suit non-cutting instruments, trays and implants because of their excellent corrosion resistance.
Are stainless steel surgical instruments reusable?
Yes. When cleaned, inspected and sterilized correctly, stainless steel surgical instruments can be reused many times over several years.
Can stainless steel surgical instruments rust?
They resist rust very well, but poor cleaning, harsh chemicals, hard water or low-quality steel can cause corrosion, staining or pitting. Proper maintenance and passivation greatly reduce this risk.
How are stainless steel surgical instruments sterilized?
Most are sterilized in a steam autoclave using validated temperature, pressure and time cycles. Other methods include dry heat, ethylene oxide and low-temperature sterilization for heat-sensitive items. Always follow the manufacturer’s instructions.
How long do stainless steel surgical instruments last?
With proper care, high-quality instruments can last ten years or more. Cutting instruments may need periodic sharpening, and moving parts may need servicing over time.
What certifications should I look for when buying?
CE marking, ISO 13485 and FDA registration are the main indicators of quality and regulatory compliance. You can learn how medical devices are regulated in the United States on the FDA medical devices page. Ask the supplier for copies of the relevant certificates.
What is passivation and why is it important?
Passivation is a chemical treatment that removes free iron and other contaminants from the steel surface and promotes a protective chromium oxide layer. It improves corrosion resistance and helps instruments last longer.
Can I order custom or private label stainless steel surgical instruments?
Yes. Many manufacturers, including OrthoGear Surgical, offer custom designs, OEM production and private label branding for distributors and healthcare brands. Visit our custom manufacturing page to learn more.
Conclusion
Stainless steel surgical instruments combine strength, precision and hygiene, which is why they remain the first choice in operating rooms worldwide. Knowing the main grades, the six essential types, the manufacturing process and the right cleaning and sterilization practices helps healthcare professionals and buyers make safer, smarter decisions.
When you choose stainless steel surgical instruments, focus on material quality, finish, mechanical performance, certifications and the reputation of the manufacturer. Then protect your investment through careful cleaning, drying, lubrication, inspection and storage.
Looking for premium stainless steel surgical instruments? Explore our full product catalogue, or contact OrthoGear Surgical today for CE and ISO certified products, custom orders, private labeling and competitive bulk pricing.


One thought on “Stainless Steel Surgical Instruments: 6 Must-Know Types, Grades & Uses”